Spice Dispenser Machine Using Arduino
Recently, I've taken up cooking, but more often than not, I find myself adding the wrong spice to my dishes!
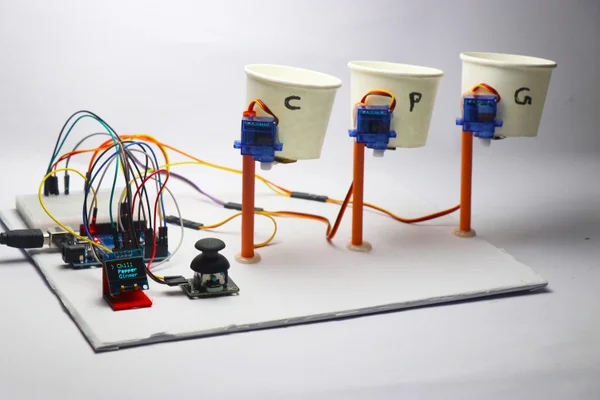
You can imagine the outcome! To tackle this problem, I created a simple device that dispenses three types of spices at the touch of a button.
It features an OLED screen that displays the names of the spices, along with a joystick module that allows you to navigate through the spice options and dispense them.
Keep in mind that there are no restrictions on how to use this device; it serves as a framework that you can customize according to your needs.
Picture living in a place where the spices differ completely from what I'm accustomed to; in such scenarios, you can adjust the code so that the servo's opening and closing times vary, allowing the spices to be dispensed accordingly.
For example, if the spice properties change (like the size of the grains), you can enlarge the hole or use a larger container, which may require a sturdier closing lid.
The possibilities are limitless, but it all hinges on the specific application you intend to use.
Let me give you a brief overview of my project.
This dispenser is capable of dispensing not just spices, but also various grains or dry foods.
The onboard display features a menu that you can navigate using the joystick module; the Up/Down buttons allow you to scroll through the menu, while the Right/Left buttons let you select the desired spice.
I've set a dispensing time of one second, but you can modify this to suit your preferences.
This is an excellent project that will prove useful in the kitchen. I've provided all the resources needed to build it, including a circuit diagram and Arduino program.


These are the materials that you will need to build this project, Keep them handy so you can build this faster
Small breadboard
Jumper cables
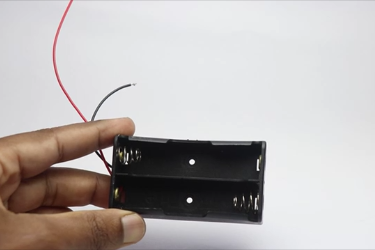
Battery holder
Paper cups/small plastic bottle
Cardboard sheet
Tubes of paper
Hot glue
Paper Glue
Spices(which you want to dispense)
Note that these are amazon affiliate links and upon successful sale i may receive a small percent at no extra cost to you, This will help me to support such cool ideas
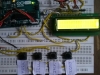
Step 1: Circuit and Codes


The circuit diagram you see might appear intricate to many readers who are just starting with electronics! But don't worry, I will clarify it for you, component by component. In this project, we will utilize three distinct electronic modules in addition to the Arduino. I will explain each one individually. The first module is the micro servo; I will be using three of these, and each will dispense spice sequentially. I will set up a breadboard and connect the power rails of each breadboard to the 5V and GND of the Uno board. The Vcc and GND of the servo will be linked to these power rails, while the servo's signal will connect to the D5, D6, and D7 pins of the Uno board, completing the servo connection. The second component is the OLED, which has four pins: GND, Vcc, SCK, and SDA. The power pins will connect to the power rails on the breadboard, with SCK linked to A5 and SDA to A4 on the Uno. The final component is the joystick module, whose power pins will also connect to the power rails on the breadboard, while the Vrx and Vry (vertical and horizontal pins) will connect to A0 and A1 pins on the Uno board. Once all connections are made, connect the Uno board to your computer using the programming cable and open the Arduino IDE. Copy and paste the Arduino program provided below into the IDE, and click the upload button after verifying the port and board type in the IDE. After the code uploads successfully, we can proceed to test the circuit, which I will demonstrate in the next step.
Attachments

Step 2: Build Phase

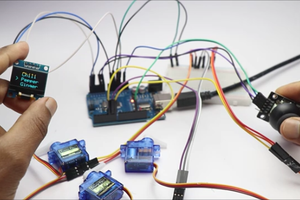


To verify if the circuit is functioning properly, simply connect the USB cable to your computer and the other end to the Uno board.
You will see a message displayed on the OLED board, and you can navigate through the options using the joystick module. The joystick module features 5 buttons that are controlled by a single switch.
Moving the joystick up and down will allow you to scroll through the menu options, while moving it left and right will enable you to select an option!
After you choose an option (menu) and press the left or right button, the servo should start moving. The horns will open and close for 1 second, and you can repeat this process for the other two servos.
Once we confirm that the circuit is operational, we can assemble all these components onto a piece of cardboard. Use hot glue as needed, and there are no strict rules for positioning the components.
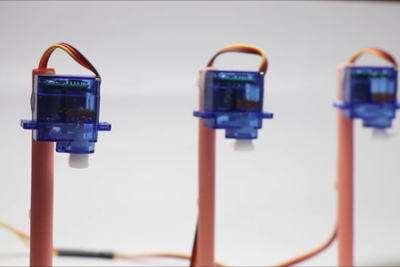
To create the servo and dispenser mechanism, we will need a stand, and I plan to use paper tubes for this purpose.
Simply apply hot glue and attach the paper tubes, allowing them to dry completely. Attach the servo at the tip, and then we can proceed to construct the container holder and dispensing mechanism.
You can also substitute this open circuit with a compact PCB. Complete your electronic projects effectively with PCBWay.
Why choose them? They have provided me with the highest quality PCBs, which are simply outstanding compared to other suppliers in the market. They also offer Color PCB printing, so be sure to check it out.
Check here for their Multicolor 3D printing service; this will make your project even more exciting.
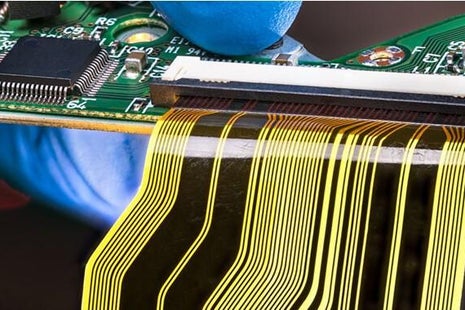
A groundbreaking solution that merges the best aspects of both rigid and flexible circuitry, taking your electronic projects to new levels.
Their expertise in advanced manufacturing techniques ensures a smooth integration of rigid and flexible components, providing improved reliability, durability, and space-saving advantages.
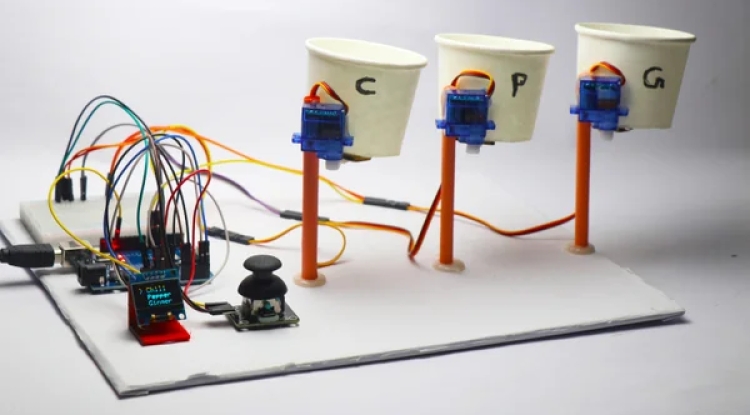
Step 3: Dispense Mechanism


I selected a straightforward yet efficient mechanism for dispensing food in this project, and I would like to outline additional options that you may also consider implementing.
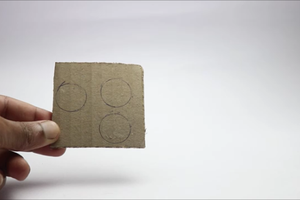
Paper cups are simple to handle, and I created a small opening at the base of these cups, while a circle was drawn on the cardboard that is slightly larger than the hole.
Adhere the circle to the servo horn and allow it to dry thoroughly. Next, attach these cups to the pillars using hot glue.
Make any necessary minor adjustments and arrange the cables neatly on the cardboard to ensure they do not interfere when the project is operational.
You are welcome to make your own modifications to this project to enhance its appearance further.
Once this is completed, we can proceed to test the project, which is the most thrilling aspect of this endeavor.
Step 4: Testing


This represents the most significant aspect of the project, as it tests our efforts to determine whether it yields the anticipated results. If you have adhered to all instructions, it will certainly succeed!
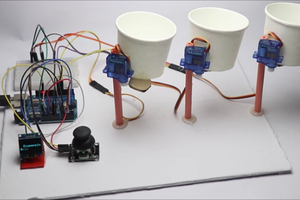
I will commence by filling the container with food (spices); in my case, I will utilize grains to evaluate the functionality.
Begin by filling the container with rice, and then power on the Arduino Uno board using the USB power supply. You will now observe a message on the OLED screen prompting you for options.
Utilize the joystick module (up and down buttons) to navigate through the options, and use either the left or right button on the joystick module to select your choice.
You will witness the servo horn opening and closing, thereby dispensing the specified type of spices. To facilitate understanding of the type of spice or food being dispensed, I have labeled the initial letter of each on the container.
Should you wish to dispense different food items using this machine, you can achieve this by making minor adjustments to the size of the stopper and the hole in the container. Additionally, the quantity can be modified through the Arduino program.
CODE
#include
#define SCREEN_WIDTH 128
#define SCREEN_HEIGHT 64
#define OLED_RESET -1
Adafruit_SSD1306 display(SCREEN_WIDTH, SCREEN_HEIGHT, &Wire, OLED_RESET);
#define JOYSTICK_X A0
#define JOYSTICK_Y A1
#define SERVO_1 5 // Servo for Chili
#define SERVO_2 6 // Servo for Pepper
#define SERVO_3 7 // Servo for Ginger
Servo servo1, servo2, servo3;
int selectedSpice = 0;
void setup() {
Serial.begin(9600);
// Initialize OLED
if (!display.begin(SSD1306_SWITCHCAPVCC, 0x3C)) {
Serial.println("SSD1306 allocation failed");
for (;;);
}
// Attach Servos
servo1.attach(SERVO_1);
servo2.attach(SERVO_2);
servo3.attach(SERVO_3);
updateDisplay(); // Show initial menu
}
void loop() {
int yValue = analogRead(JOYSTICK_Y); // Read Y-axis for UP/DOWN movement
int xValue = analogRead(JOYSTICK_X); // Read X-axis for LEFT/RIGHT (for dispensing)
Serial.print("X: "); Serial.print(xValue);
Serial.print(" | Y: "); Serial.println(yValue); // For debugging
// Set stronger dead zone (movement detected only when joystick is pushed far enough)
if (yValue < 300) { // Move UP
if (selectedSpice > 0) {
selectedSpice--;
updateDisplay();
delay(500); // Debounce delay
}
}
else if (yValue > 700) { // Move DOWN
if (selectedSpice < 2) {
selectedSpice++;
updateDisplay();
delay(500); // Debounce delay
}
}
// Dispense spice when moving joystick Left/Right
if (xValue < 300 || xValue > 700) { // Detect LEFT/RIGHT movement
displayDispensingMessage();
dispenseSpice(selectedSpice); // Dispense spice based on selection
updateDisplay(); // Return to main menu
delay(500); // Wait a bit before returning to menu
}
}
void updateDisplay() {
display.clearDisplay();
display.setTextSize(2);
display.setTextColor(WHITE);
// Display Spice Options
display.setCursor(10, 10);
display.println((selectedSpice == 0) ? "> Chili" : " Chili");
display.setCursor(10, 30);
display.println((selectedSpice == 1) ? "> Pepper" : " Pepper");
display.setCursor(10, 50);
display.println((selectedSpice == 2) ? "> Ginger" : " Ginger");
display.display(); // Update the OLED screen
}
void displayDispensingMessage() {
display.clearDisplay();
display.setTextSize(2);
display.setTextColor(WHITE);
display.setCursor(20, 30);
display.println("Dispensing...");
display.display();
delay(1000); // Wait 1 second before moving servo
}
void dispenseSpice(int spice) {
Servo *selectedServo;
// Determine which servo to control based on the selected spice
switch (spice) {
case 0:
Serial.println("Dispensing Chili...");
selectedServo = &servo1;
break;
case 1:
Serial.println("Dispensing Pepper...");
selectedServo = &servo2;
break;
case 2:
Serial.println("Dispensing Ginger...");
selectedServo = &servo3;
break;
}
selectedServo->write(60); // Rotate servo 60°
delay(1000); // Wait for 1 second
selectedServo->write(0); // Reset servo position
}
What's Your Reaction?


